- Our webinar rooms are browser-based and are best viewed on a Chrome browser.
- Some of the applications linked in Athena’s Classrooms are best viewed in a browser that allows for plugins.
Before users log into their first webinar, they should visit the Configuration & Practice Webinar Room.
- Our webinar rooms are linked to our Classrooms website.
- Webinar rooms are locked until 10 minutes before the webinar time unless otherwise specified by your instructor.
- When it is time to log into your course’s webinar session, log into Athena’s and navigate to your classroom.
- There, click on the Webinar Room & Recording Links toggle on the left-hand side of the classroom.
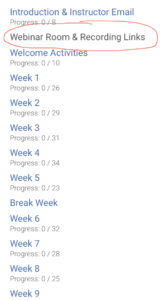
- Click the Webinar Room and Webinar Recording Link to enter the webinar room.

Loading the System
- After clicking on the corresponding webinar room, allow the system to load.
This may take some time.
(The circle in the center will appear to rotate.)

- If you are unable to log in in a timely manner, refer to the Tech Support & Troubleshooting sections.
Audio & Video Access
- When logging in, the users’ system may prompt users to allow the webinar system to access their computer’s audio and video.
- Each system is different.
- Some systems ask users to accept audio & video access upon entering the webinar room.
- Some systems require users to go into the Audio & Video Settings section in the webinar room.
- Even though the system will tap into the audio and video components in the users’ computer system, for our standard courses,
video and webcams will not be used. Users with concerns should cover their device’s camera.
View when Entering
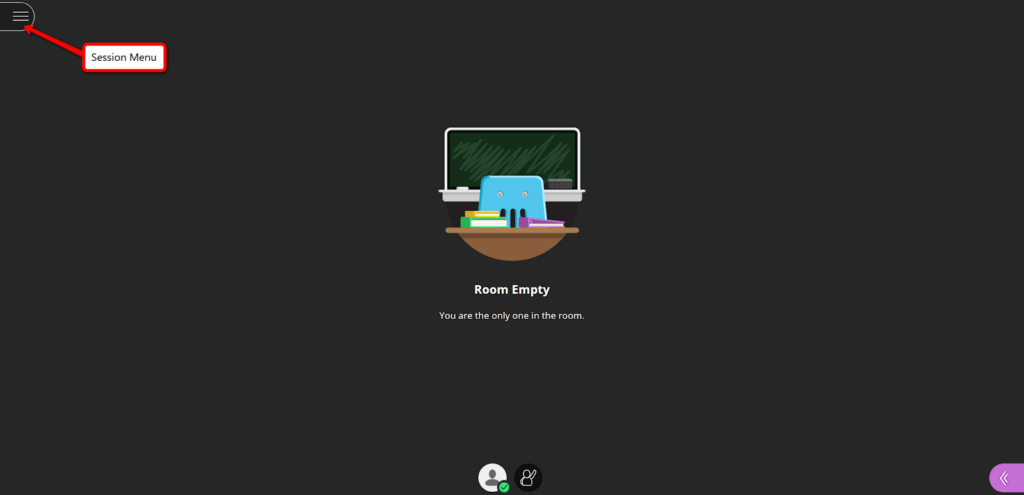
- In the screenshot below, the instructor is the only one in the room.
- When users are in the course’s webinar room, users will see course content instead of the picture in the center or user images.
![]()
Video Overview:
Please note that this video is only an overview. Refer to the rest of the section for details.
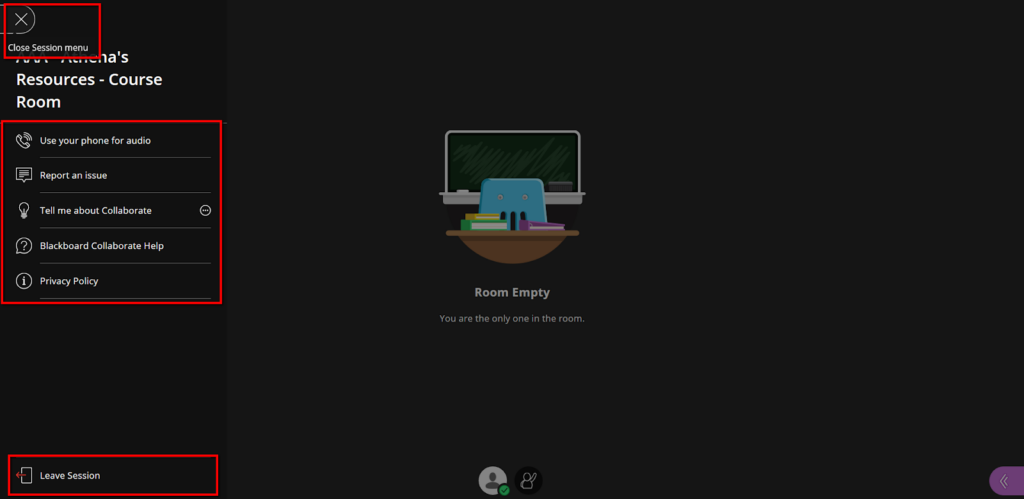
- The “Session Menu” is in the upper left-hand corner.
This section is not used very often by users. - The Session Menu is one spot where users can log out. Users can also close their browser to log out.
Closed:
Open:
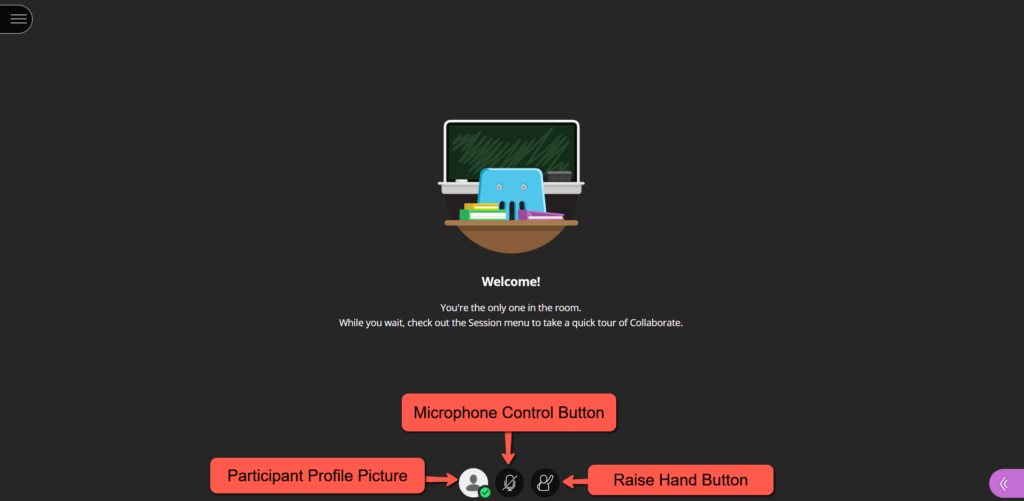
In the bottom of the center section, users will see the following information if the controls are turned on:
- User’s profile picture
- Microphone controls
- Clicking this button will turn the audio on or off.
- The microphone will only be visible if the educator has turned the controls on.
- Click on the microphone to turn it on and off when audio privileges are activated.
- Raise hand button
- Clicking this button will raise or lower the virtual hand.
- If users have a question or something to share, click the “raise hand” button.
- Graph/poll button (not shown in the screenshot below)
- If the instructor takes a poll, the graph/poll button will appear.
- Clicking on the user profile picture at the bottom of the screen pulls up the Status Menu.
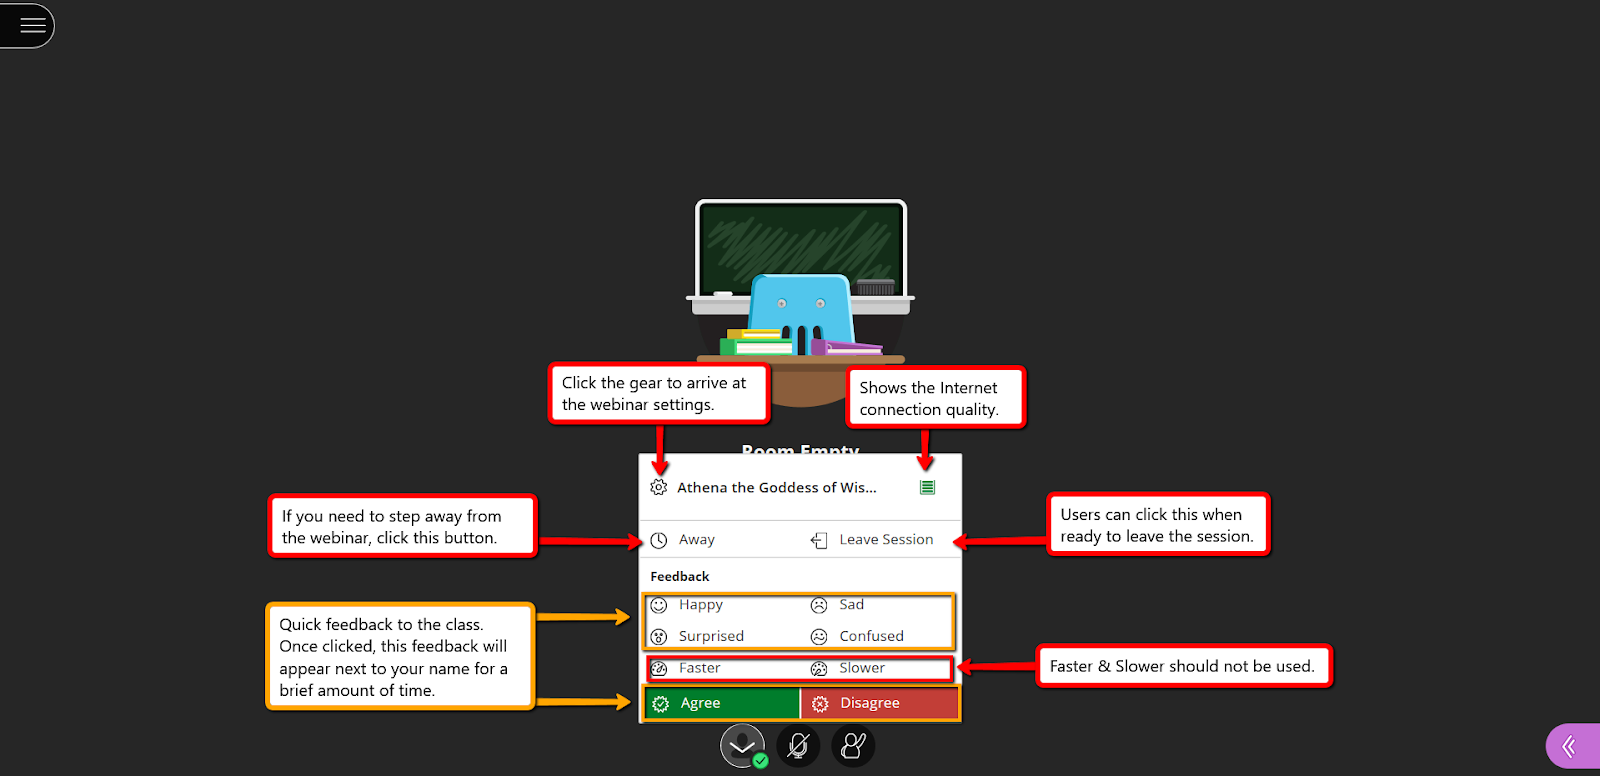
The Settings Gear
- Click on the settings gear to arrive at the webinar settings.
Internet Connection Quality
- The upper-right corner of the Status Menu shows the user’s Internet connection quality.
Away Button
- Users click this button if they need to step away from the webinar so the instructor knows not to call on them.
- Users will get a notification that shows they are away.
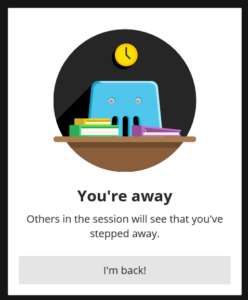
- Users should click the “I’m back!” button when they return.
Leave Session
- Users can click this button if they are ready to leave the session. This is one of several ways to leave the session. Users may simply close their browsers.
Quick Feedback
Quick Feedback- Appropriate
This Quick Feedback is appropriate to use in the webinar room on occasion.
- Happy
- Sad
- Surprised
- Confused
- Agree
- Disagree
Quick Feedback- Not Appropriate
This Quick Feedback is not appropriate to use in the webinar room because everyone speaks and discusses at their own pace.
- Faster
- Slower
- Sometimes instructors may turn on the whiteboard tools in the webinar room.
Sometimes this is done during instructional periods, sometimes it is done before or after the webinar. - Users must always remember to follow the Webinar Room directions, especially when the whiteboard tools are on.
- In addition to the information in the Athena’s Handbook, instructors will give the class instructions on which tools to use and what is expected.
When the tools are on, users will see the following:
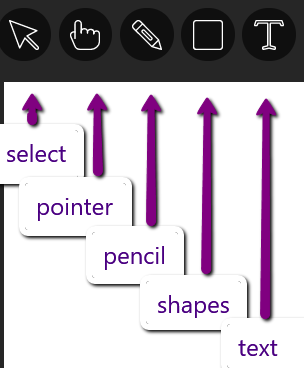
- Select: click and drag items
- Pointer: point to items
- Pencil: draw freehand
- Shapes: draw shapes
- Text: place text on the whiteboard
To place prewritten text on the whiteboard as requested by an instructor:
- Select the text tool
- Copy the text typed in a word processing program
- Paste it on the whiteboard
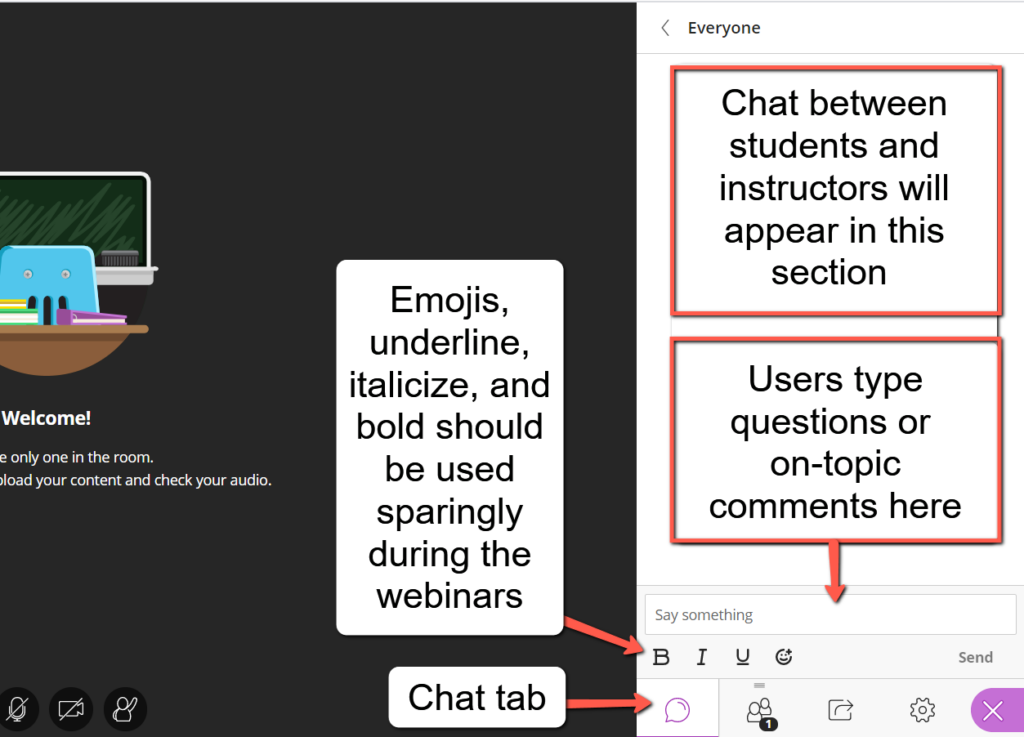
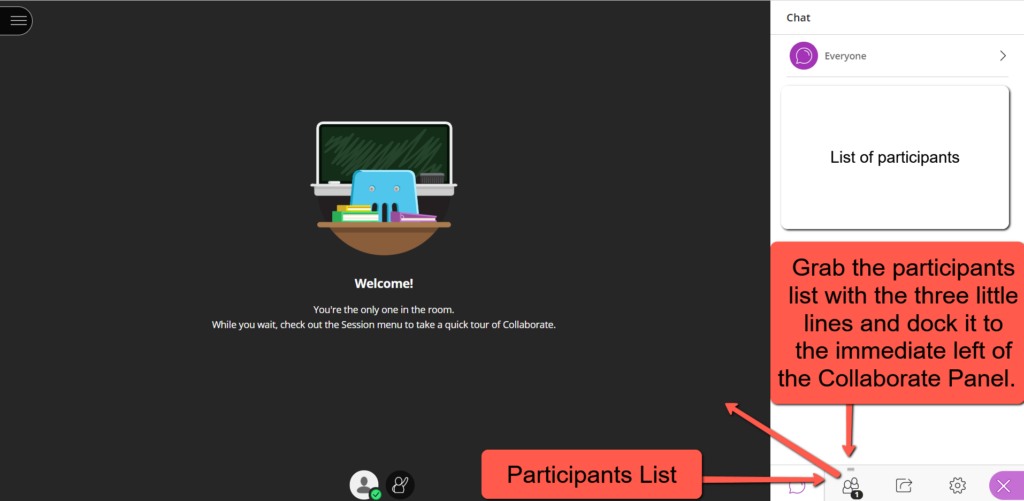
- The Collaborate Panel includes the chat area, participants list, and settings.
- Click on the Collaborate Panel toggle on the lower right-hand side.
- Users may hide the Collaborate Panel and the chat area to minimize distraction.

- The tab with the speech bubble in the Collaborate Panel is the Chat area.
- Be sure to follow the webinar rules located in the Athena’s Handbook.
- Users may hide the Collaborate Panel and the chat area to minimize distraction.
- Locate the chat section:
- Be sure to follow the webinar rules located in the Athena’s Handbook.
- The tab with the little people contains the Attendees List. Click the tab to see the participants (students) in the webinar.
- To dock the Attendees List to the immediate left of the Collaborate Panel, click on the three lines and drag to the left.
- Reverse the process to return the List to the Collaborate Panel.
- The tab with the gear is the Settings tab.
- See more information about this tab below.
- The tab with the gear is the Settings tab.
- Connecting to others can be critical to a successful online learning experience.
Something as simple as adding a profile image can make learners more comfortable with participating online. - This photo can be the same one uploaded to the Classroom site or another photo may be used.
The photos used should be parent-approved and within the guidelines set in the Athena’s Handbook. - Browsers will remember user profile pictures unless the cache is cleared.
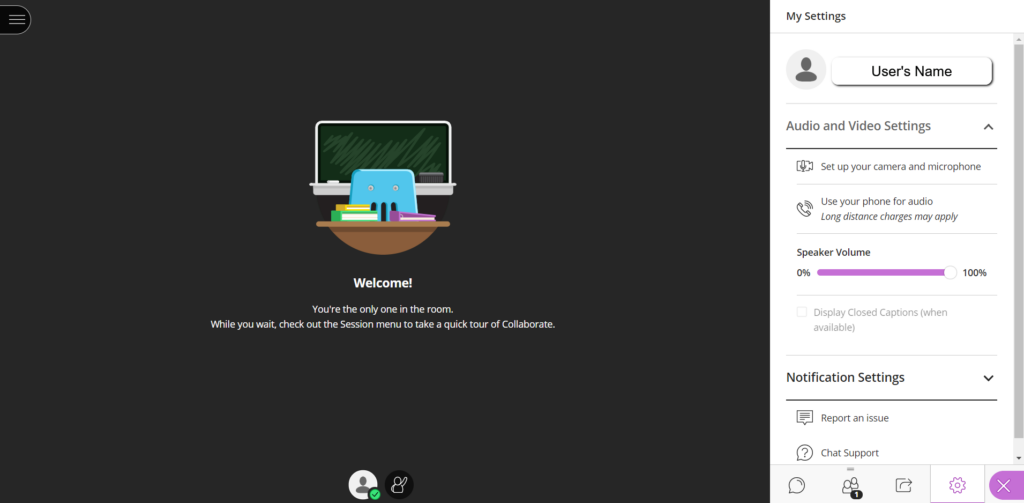
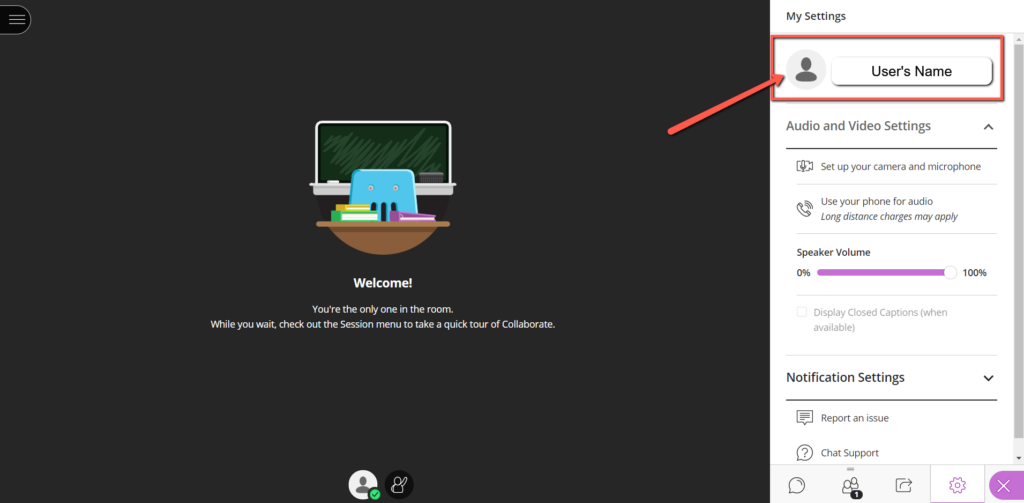
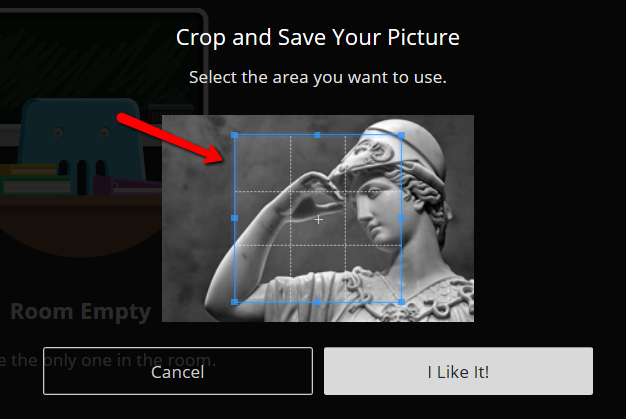
To change the profile picture, do the following:
- Open My Settings
- Click on the grey silhouette
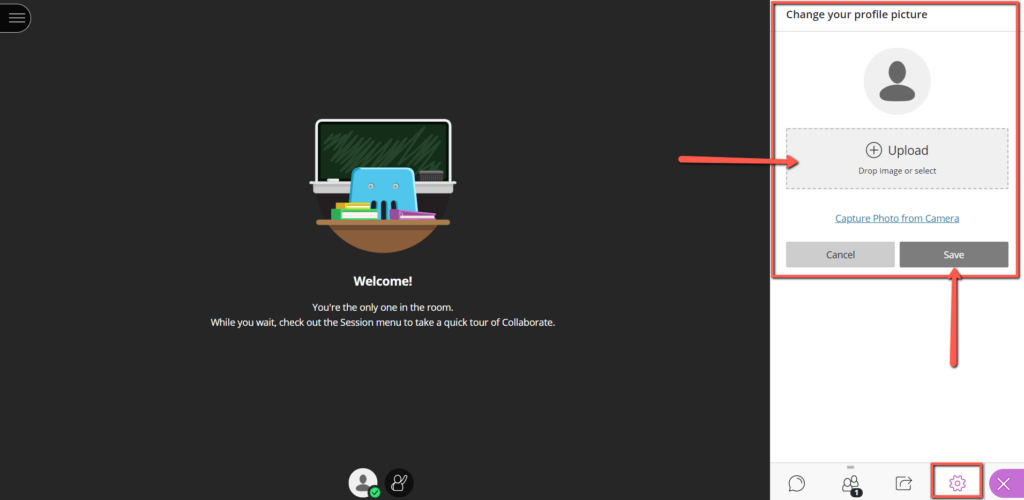
- Adjust the image area and select “I like it.”
- Although webcams are not used in Athena’s course webinars,
the webinar system will still connect to the user’s computer’s webcam or camera system.
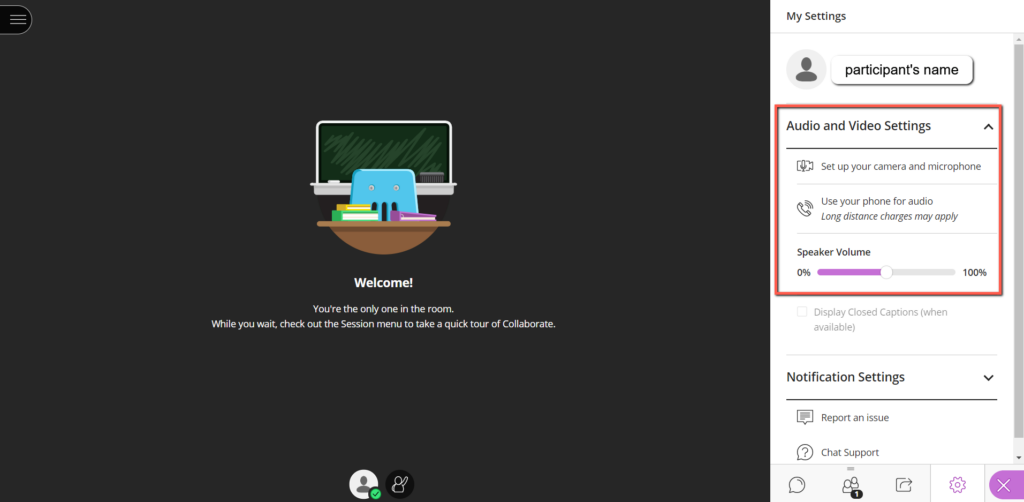
- Click on Set up your camera and microphone after entering the webinar room to make sure the system is ready when the webinar begins.
- Although webcams are not used in Athena’s course webinars,
the webinar system will still connect to the user’s computer’s webcam or camera system. - Click on Set up your camera and microphone
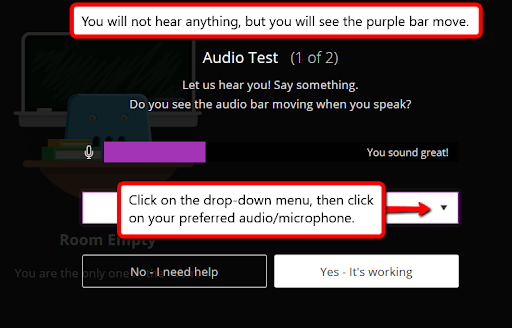
Microphone/Audio Test (1 of 2)
- Audio Test (1 of 2) pops up
- Click on the drop-down menu, then click on the preferred audio/microphone
- Users will not hear anything, but users will see the purple bar move if the microphone is being picked up
- If it is not working, click No – I need help
- Students may need a parent’s assistance
- If it is working, click Yes – It’s working
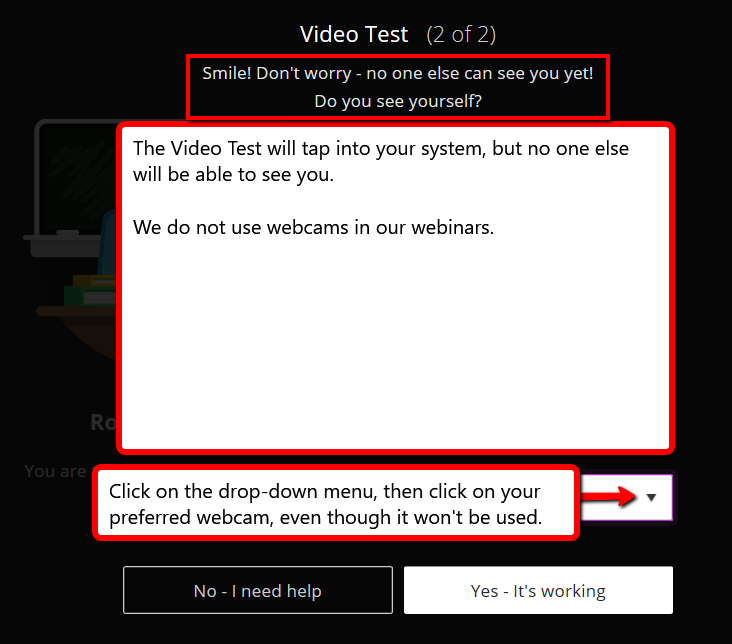
Video Test (2 of 2)
- The video test is only to engage the components
Webcams are not used in our regular course webinars - If it is not working, click No – I need help
- Students may need a parent’s assistance
- If it is working, click Yes – It’s working
If you have any trouble with your audio or microphone, click on Use your phone for audio.
- Click on Use your phone for audio, this will generate a PIN number
- Click the link
- Call the number provided
- Enter the PIN number when prompted
- Listen and speak in the webinar with your phone
- Mute your phone when you are not speaking
- Adjust your speaker volume from left to right to fine-tune your audio experience
- Click on Notification Settings to fine-tune the user experience.
- Check or un-check the preferred notifications.
- For example: Un-check the Audio notification if the user does not want to hear the “bloop” sound each time someone posts a chat message.
- Important: Turning off notifications will minimize distractions.
Users may hide the Collaborate Panel and the chat area to minimize distraction.
